Showing posts with label DIY. Show all posts

8.19.2013

D I Y : Pipe Pouch


I recently had my friends very talented dad craft me a pipe, I asked him if he could burn an echinacea flower on it and he came up with the loveliest design. I've just been smitten over those blooms this summer so I thought it would be a nice addition to my new companion.
After receiving my pipe and smoking it once or twice, I decided that I needed to make a little pouch to carry my pipe necessities inside of. 
I visited my town's leather goods store and went straight to the scrap bin priced per pound and picked out the softest shade of brown I could find as well as grabbing a couple one dollar ties for the draw string. Other than that all you need for this project is a sewing machine or  needle and thread and a hole puncher! 


First you, measure your pipe and the goods you want to fit inside of your pouch. 
Then cut out two identical peices.
Next, sew the two pieces together, outside in.
Flip your pouch right side out and you're almost there!


Take your hole puncher and punch two pairs of two holes into each side near the top.
Lace in your leather string and draw it up.


Now you have a friendly pouch to put your goodies in! Yay!


Of course, your pouch could be anything you want it to be and doesn't have to house a pipe, that's just what I use mine for! You could use it for a snack sack or a pencil case! Absolutely anything your little heart desires... that is small enough to fit in this handy pouch. 

Truly // Sarah

Pipe courtesy of Wellswood Wood Works. Find him on Facebook to receive your own personally crafted pipe! 

6.07.2013

Project : Nightstand Restyle


Furniture is expensive. If you're like me... a poor college student, you know that furniture is one thing that you must find at a flea market or salvage left overs from a family member to furnish your space. I was fortunate enough to receive my brother's hand-me-down nightstand and dresser for my room. I wasn't complaining, I love the western styled handles and cuts they have. One thing that bugged me though was all the damage on the table top. There were markings with crayon and pen, scratches, and ring stains. I wasn't expecting any less... it was already a miracle that it lasted through my brothers child hood! Yikes! 


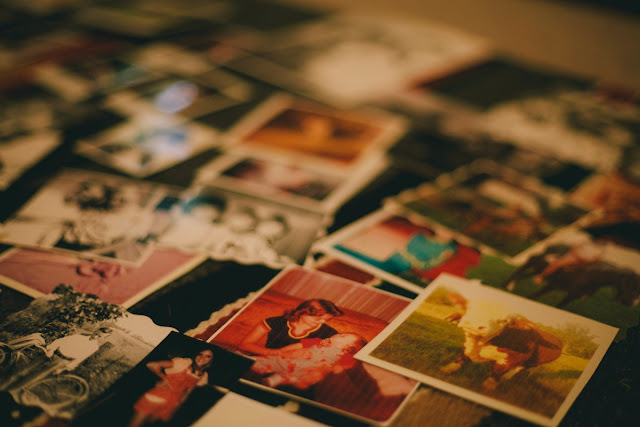
 So I decided to challenge myself to a little (Super easy!) project to make the nightstand mine and to hide some of it's blemishes! I have always been a fan of my parents' childhood photos, so I visited my Granny and looked through some of her albums. I scanned my favorites and started assembling a collage. I incorporated some polaroids from my instax and some pretty magazine clippings as well.


 Once I organized them on my nightstand, I decided to add some flowers that I had dried. After this I pressed on a glass table top that I had made in town to seal it all up, protect the pictures, and keep it all in place. It turned out nicely.


I'm excited with the outcome. I think this would look lovely on a living room coffee table! What a fun centerpiece to a room and a great conversation starter. Friends and family would love to look at these.
Do you have any fun projects planned to improve your space this summer? 

Truly // Sarah


2.11.2013

DIY | Table Centerpiece


       For those couples who may be staying in this Valentine's Day, because you desire to avoid all of the hustle and bustle it brings, you might be interested in this little project. I created this table centerpeice to shape a romantic atmosphere for my love and I on Valentines Day. 
     My boyfriend, Nathan and I are quite the home bodies. Don't get me wrong we love dressing up and going out, but we do our best to dodge loud and crowded environments. Especially when we want to be able to talk and listen to each other. It's hard to enjoy each other's company to the fullest when a stranger is sitting, literally, at the same table as you. So we decided to stay in, save money, make dinner together, and set up a moment that's especially sweet.
      This project is fairly cheap and pretty easy to create. I had lots of fun making this lovely centerpiece for the dinner table. Here's how I did it...

Supplies needed:
>Pressed Flowers
>Paint brush
>Painter's tape
>A bag of pine firewood (Price Cutter)
>Minwax Polyurethane (Walmart)
>Acrylic or Silicone aerosol spray (Hobby Lobby)
{Any other decorative objects you would like to use to create a unique look. I used forest animal figurines, a doily, and a vintage candle stick and wooden candle holder.}


Step 1: Coat the wood with the Polyurethane. This makes the wood look a lot nicer and creates a deeper brown, which you'll love.
Step 2: Tape around the edges of the wood, so that you don't coat anything unnecessary (less mess). Place the pressed flowers on the wood & apply 2-3 Coats of acrylic spray.
Step 3:  Allow 24 hours to dry. Decide the following day if you want to apply any extra coats.


Step 4: Arrange the lovely pieces on your dinner table. Add any accessories you desire. I wanted to shape a romantic forest-like feeling so I added a few deer figurines.
 This project is super simple and extremely customizable! There are so many different things you can do with it. The great thing about it, is you can keep it as a centerpiece all spring. You and your honey can constantly be reminded of the special night you held each other's hearts.

Happy Valentine's Day, sweet friends!

Truly // Sarah